
Using the Reverse Proxy Server Feature
This feature is available in the RDPlus Enterprise Edition.
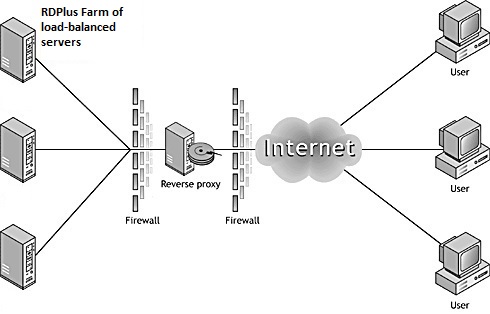
The Reverse Proxy system acts as an intermediary for its associated servers to be contacted by any client.
The advantage of using a reverse-proxy is simple: you will no longer need to create as many port redirection rules as your number of RDPlus servers.
Whether or not you are using the load balancing feature, you need to activate it in order to connect using the reverse proxy. In RDPlus, it provides a unique access point to a farm of load-balanced RDPlus servers:
This unique access point will be your Gateway Portal Server.
Since this server is going to be accessed remotely, you will need to set up one port redirection rule on your router, including the http or https ports depending on your preference (80 being the default port for http and 443 for https).
Click on the Farm Tab, then click on the Reverse-Proxy tab:
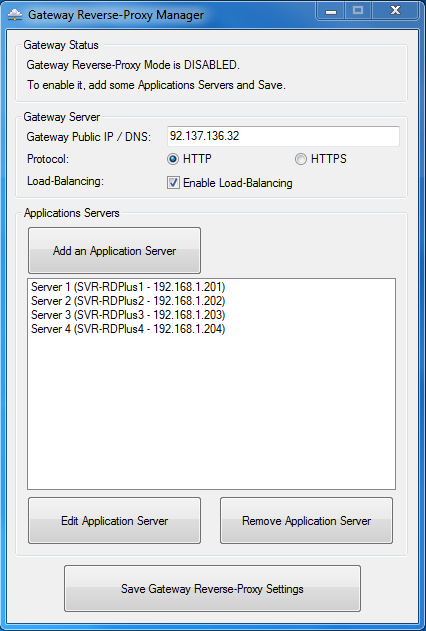
- The Gateway Public IP must be set with a fixed valid IP address.
- Select Http or Https for your preferred connection method, the servers of your farm must be able to communicate with eachother on either port 80 or 443, depending on which connection method you use. It is also important that your windows firewall don’t block these ports.
- Enable the load-balancing feature if you wish to load-balance your farm. If you do not activate this feature, you will need to assign the servers of your farm to the Users or Groups. More information on this subject can be found here.
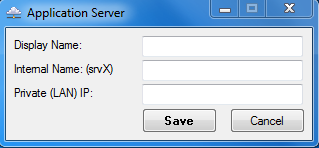
- Click on “Add an Application server” and fill in the Display Name for your server, its hostname in the Internal Name field and its Private (LAN) IP address, then click on “Save”.
Once you completed your list of servers, click on “Save Gateway Reverse-Proxy settings” and restart the Web services located in the Admin Tool’s Web tile.
Reverse-Proxy and Generated Connection Clients
You can generate a Connection Client which will connect to an Application Server through the Reverse-Proxy Server.
To do so, assuming that your gateway has public IP 1.1.1.1 and your backend server has internal name “srv2”, then use the special URL 1.1.1.1:443/~~srv2 in the server address field of the Connection Client Generator.
For example:
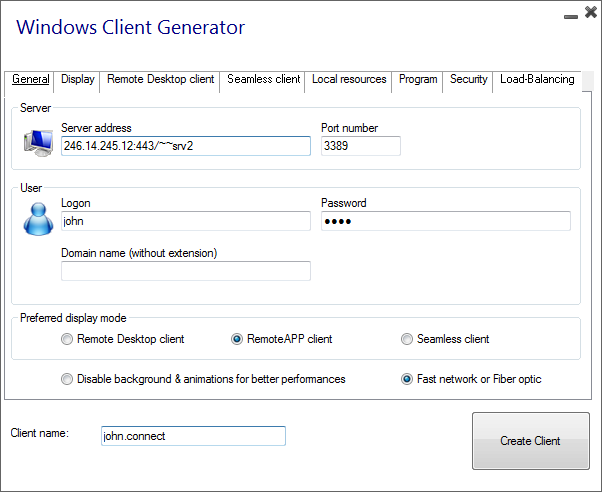
Don’t forget to also check this box:
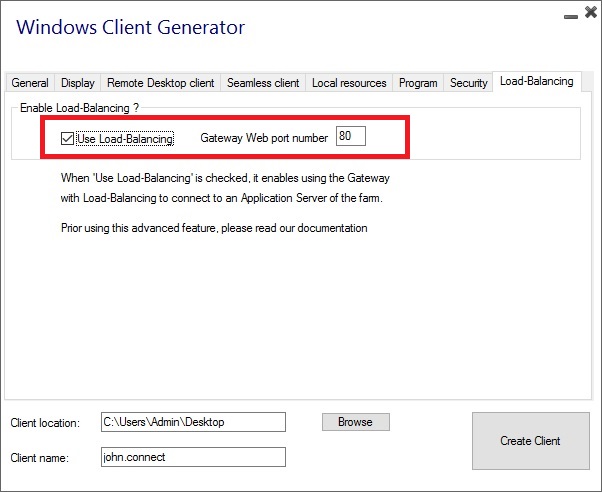
Unless you want to connect to a given Application server.